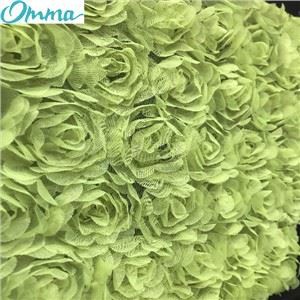
If you work in the embroidery or apparel industry, you know how frustrating it is to invest in high-quality rayon embroidery fabric only to ruin it with messy cuts. As a supplier with years of experience working with artisans, small boutique designers, and large manufacturing teams, I’ve seen this mistake happen more times than I can count. Rayon is a beautiful fabric—soft, drapey, and perfect for detailed stitches—but its natural cellulose fibers make it prone to stretching, fraying, and shifting if you don’t approach cutting it correctly. This guide walks you through the exact, science-backed steps to cut rayon embroidery fabric accurately, plus pro tips I’ve picked up in 10+ years in the trade.
First, let’s talk about why rayon is different from other fabrics. Unlike rigid cotton or polyester, rayon has a high moisture absorbency rate (it can take in 10-15% of its weight in water) and low elastic recovery, meaning it stretches easily when pressure is applied and doesn’t snap back to its original shape. This is great for flowy blouses, dresses, and home decor, but a nightmare when you’re trying to cut precise, consistent pieces for embroidery projects. I once watched a boutique owner accidentally stretch a 2-yard bolt of rayon while cutting it, turning perfectly aligned pattern pieces into lopsided scraps that had to be thrown out. The fix isn’t complicated—you just need to work with rayon’s properties, against the things that cause inaccuracy.
Before you even pick up a pair of scissors or a rotary cutter, the most important step is preparing your fabric. Rayon comes from the mill rolled tightly around a bolt, and that tension causes the edges to curl and the grain to shift if you don’t relax it first. Here’s what I recommend: unroll your rayon embroidery fabric and lay it flat on a clean, smooth surface (I use a large, wooden cutting table without any rough spots that could snag fibers) for at least 24 hours. If you’re working in a humid environment, you can skip the iron step, but if your space is dry, spritz the back of the fabric lightly with lukewarm water (not so much that it’s dripping) and let it air-dry flat. This releases the mill tension and makes the fabric lie straight, which is non-negotiable for accurate cuts. I also suggest doing a quick grain check before moving on: pull a thread from the crosswise edge of the fabric. If it pulls straight across without resistance, the grain is set. If it pulls diagonally or feels tight, leave it another 12 hours—patience here saves you from re-cutting later.
Next, gather your tools. Using the wrong tools is another top reason cuts go wrong for new designers. For rayon embroidery fabric, you’ll want: a sharp pair of fabric shears (not kitchen scissors or paper cutters—those dull blades that catch fibers), a rotary cutter with a fresh 45mm blade (great for long, straight cuts on large pieces), a clear quilting ruler (24” long is ideal, since it covers most standard fabric widths), marking tools that don’t bleed (air-erasable pens, chalk wheels, or tailor’s tacks—avoid permanent markers at all costs, especially since rayon’s porous surface holds ink), and weights instead of pins. Wait, weights? Pins can leave tiny holes in rayon, and if you pin too hard, you stretch the fabric. I use 1-2 inch metal washers or pattern weights (you can even use small wrapped cans of soup) to hold pattern pieces or the fabric flat while cutting. If you need to pin for very intricate embroidery patterns, use very fine silk pins and pull them out as you cut, not after.
Now, let’s talk about laying out your pattern pieces. This is where many people make their biggest mistake: cramming too many pieces on the fabric or aligning them wrong. For rayon, always use a pattern that’s designed for stretchy or medium-weight fabrics—patterns for rigid cotton won’t account for rayon’s drape, leading to ill-fitting finished items. Lay your pre-relaxed fabric flat, then smooth it with your hands (starting from the center and moving outward, so you don’t create new tension) before placing your pattern pieces. Align the straight grain of the pattern with the straight grain of the fabric—this is why that grain check from earlier is so important. If your pattern has a “grainline” mark, line that up with a thread you’ve pulled from the fabric edge, pinning only if necessary. For embroidery patterns, remember to leave extra seam allowance—rayon frays more than cotton, so adding ⅝ inch instead of the standard ½ inch will prevent edges from unraveling during stitching and finishing. I always tell customers who order from our site that our rayon embroidery fabric is pre-treated to reduce fraying, but seam allowance is still a safe bet for precision cuts.


Cutting technique itself requires a little care. If you’re using shears, hold them at a 45-degree angle to the fabric, not straight up and down, to create a clean edge without catching fibers. Cut in one smooth, steady motion—don’t snip back and forth, as that pulls the fabric and creates uneven edges. If you’re using a rotary cutter, make sure your ruler is absolutely flat against the fabric (place weights on the ends of the ruler to stop it from shifting) and roll the cutter toward your body, keeping consistent pressure. Never lift the rotary cutter mid-cut, as this will create a bump. For curved edges (common in embroidery for floral or organic patterns), use a pair of small embroidery scissors instead of a rotary cutter—they give you more control around tight curves and prevent stretching. One pro tip: cut only one layer of rayon at a time if you’re working with less than 3 yards of fabric. Stacking layers causes friction, and rayon’s tendency to stretch means the top and bottom layers will shift, leading to pieces that don’t match up when you’re ready to embroider. For larger bolts, you can cut two layers if they’re both fully relaxed and aligned, but I still recommend checking each edge before moving on.
Another often-overlooked step is edge finishing right after cutting. Rayon’s fine fibers separate easily once cut, so if you leave the edges raw, you’ll get fraying as you handle the fabric for embroidery. This ruins accuracy because frayed edges make it hard to align pattern pieces or line up embroidery designs. For straight cuts, I like to lightly run a zig-zag stitch along the edge on a low tension setting, or use a fabric fray check (water-based, so it won’t stain the fabric). For embroidered pieces themselves, the stitching will hold the edges together, but the cut edge of the unstitched fabric should still be finished. I also avoid washing rayon before cutting—washing can shrink it by 5-7% if it’s not pre-treated, so cutting it to size after washing means you’ll have to adjust patterns, leading to inaccuracy. All the rayon embroidery fabric we supply is pre-washed and pre-shrunk, so you can cut it straight from the bolt without worrying about shrinkage later, which saves time and reduces waste.
Let’s address common mistakes I see, even among experienced designers. One is ironing the fabric after cutting. High heat can melt or scorch rayon—its melting point is around 350°F, but it can discolor at temperatures as low as 300°F. If you need to smooth a cut piece, use a low-heat setting (silk or rayon) with a press cloth between the iron and fabric, and press (don’t rub) to avoid stretching. Another mistake is using the wrong marking tool. Gel pens bleed into rayon’s porous fibers, and chalk sticks can leave a residue that’s hard to brush off. Stick to air-erasable pens that disappear with a little steam or time, or chalk wheels that roll off without leaving marks. If you’re working with a very delicate rayon, tailor’s tacks (small stitches of contrasting thread that you remove after cutting) are the safest option, even if they take a little extra time.
Now, compare rayon to other fabrics for context, so you know when to adjust your process. If you’re used to working with cotton, switching to rayon means slowing down—cotton is more forgiving, but rayon isn’t. For example, solid eyelet embroidery fabric is stiffer than rayon, so you can pin it, but for our rayon, weights are better. Combed cotton embroidery fabric is also more rigid, so cutting it is faster, but rayon needs that extra relaxation time. Even semi combed cotton embroidery fabric, which is slightly softer than full combed cotton, still doesn’t have the same stretch as rayon, so you’ll see a difference in how much care you need to take when laying out patterns. SCHIFFILI embroidery fabric, on the other hand, is a type of cotton-synthetic blend, which has less moisture absorbency than rayon, so it resists stretching more during cutting. That’s why our rayon stands out for embroidery projects that need softness, but you have to adjust your technique to work with its unique properties.
Once you’ve cut your pieces, double-check their accuracy before you start embroidering. Lay them flat on the cutting table and measure the length and width with your ruler—any difference larger than ⅛ inch means something shifted during cutting, and you’ll need to re-cut. Run a quick finger along the edges to make sure there’s no fraying, and check that the grain is still straight by pulling a thread across the edge. This final check takes just a minute, but it saves you from wasting hours on embroidery that will end up being lopsided or uneven.
At the end of the day, cutting rayon accurately is all about respect for the fabric—understanding that it’s soft, stretchy, and requires a little more patience than stiffer fabrics, but that payoff is a beautiful, drapey finished piece that embroidery will look stunning on. If you’re looking for high-quality rayon embroidery fabric, our selection is designed for exactly this kind of precision work, with consistent sizing and pre-treatment to make cutting easier. Whether you’re a small boutique, a home artisan, or a large apparel manufacturer, we can help you find the right fabric and answer any questions about cutting techniques tailored to your project.
If you’re ready to source rayon embroidery fabric for your next project, or need more personalized tips for cutting your specific pieces, don’t hesitate to reach out to our team. We work with designers at every skill level, and we’re here to help you get perfect cuts every time, no matter the size of your order.
References
- Textile Institute. (2021). Properties and Processing of Rayon Cellulose Fibers. Journal of Textile Science and Engineering, 11(3), 145-158.
- Embroidery Guild of America. (2022). Guide to Cutting and Preparing Fabric for Embroidery Projects. EGA Technical Manual, 17th Ed.
- Cotton Council International. (2020). A Comparison of Cotton and Rayon Fabric Handling for Apparel and Textile Applications. Textile Processing Report, 42(2), 78-85.