If you’ve ever sat down to a meal and noticed the way a well-stitched napkin catches the light—little floral blooms peeking along the edges, delicate loops of thread that feel like they were made just for that table—you’ve felt the quiet magic of hand-embroidered linens. As someone who runs an Embroidery Fabric Floral supplier, I spend most days talking to hobbyists and small business owners, and the question I hear most often is: “How do I get started making my own floral embroidery napkins without making mistakes?” It’s such a good question—because napkins aren’t just functional; they’re little pieces of your creativity that people use every day, tucked into laps, folded for special occasions, or left on a holiday table where everyone can see the care that went into them.
I’ve been designing and sourcing embroidery fabrics for over a decade, and I’ve made more bad floral napkins than I can count—ones where the thread frayed halfway through a flower, where the fabric bunched under the needle, where I picked a bloom that was too big for a small napkin. Today, I want to walk you through the exact process I use when I’m making custom floral napkins, with tips that come from both my years behind the sewing machine and my work helping customers pick the right fabric for their projects. And since I know how important it is to use the right base material (it’s the backbone of any good embroidery), I’ll weave in links to the fabrics my team and I trust most for this kind of work.
The first step, and the one that makes or breaks your final napkin, is picking your fabric. You can embroider on almost anything—old t-shirts, heavy canvas, even burlap—but napkins need to be soft enough to wipe mouths, durable enough to wash over and over, and thin enough that your stitches don’t pull the fabric tight. After testing dozens of materials, three stand out for floral embroidery napkins.
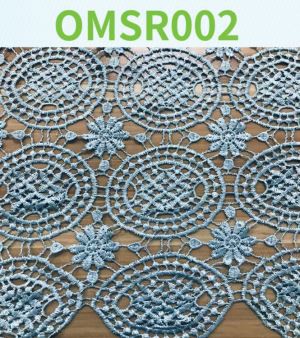
The first is Cotton Lace Fabric, available at Cotton Lace Fabric. This is my go-to for delicate, vintage-style napkins. The open lace weave means your floral stitches pop against the airy fabric, and it’s pre-treated to resist shrinking, which is a huge plus when you’re washing linens after finishing. I used this for my sister’s wedding napkins a few years back—small daisies and rosebuds stitched into the eyelet holes, and they still look new three marriages later. The only thing to note with Cotton Lace Fabric is that it has a slight texture; if you’re a beginner, you’ll want to use a slightly larger needle (size 9 or 10) to glide through the weave without catching.
If you want something simpler, a crisp white cotton napkin is classic, and White Cotton Eyelet Embroidery Fabric is perfect for that. You can find it at White Cotton Eyelet Embroidery Fabric. This fabric has tiny, uniform eyelet holes that are already stitched in, so your floral designs can complement those existing holes instead of fighting against them. I love using this for bright, modern flowers—think neon thread or soft pastels that contrast with the clean white base. It’s also lightweight enough to fold into those sharp, neat napkin shapes, which is key for a polished table setting.
A lot of people don’t think about using jersey for embroidery, but Embroidery On Jersey Fabric (available at Embroidery On Jersey Fabric) works surprisingly well for casual, everyday napkins. It’s stretchy, soft, and holds stitches really well without puckering. I used this for a set of napkins I made for my daughter’s college apartment—they’re tough enough for weekly washing, and the floral designs don’t fade even after a year in the dryer. The only caveat with jersey is that you’ll need to use a stabilizer (more on that later) to keep the fabric from shifting under your needle.
Once you’ve picked your fabric, the next step is measuring and cutting. Most napkins are 16x16 inches, which is a standard size that fits any plate and folds nicely. If you want larger napkins for holiday meals, go 18x18 inches, but keep in mind that smaller designs work better on smaller pieces. The easiest way to cut your fabric is to use a rotary cutter and a self-healing mat—it gives you straight edges every time, which is important because uneven edges will make your finished napkin look messy. If you’re buying fabric by the yard, you can get about five napkins from a yard of fabric (since most fabric is 54 inches wide), but Embroidery Fabric by Meter (available at Embroidery Fabric by Meter) is a great option if you only need a few—no need to buy a whole yard when you just want three or four.
Now, the part most beginners skip: stabilizing your fabric. This is non-negotiable if you want your stitches to look neat. A stabilizer is a thin, flat layer that goes under your fabric to keep it from shifting as you sew. For most cotton fabrics, a cut-away stabilizer is best—you stick it to the back of your fabric with a temporary adhesive spray, then stitch through both the fabric and the stabilizer, and when you’re done, you just trim the excess. If you’re using jersey, use a tear-away stabilizer, which you can gently tear off the back once you’re finished. I’ve seen people skip this step and end up with napkins where the edges are all wavy or the stitches are pulled tight—don’t be that person.


Next, transferring your floral design to the fabric. There are a few easy ways to do this, and I’ve tested them all. My favorite for napkins is a water-soluble transfer pen. You draw your design on the fabric (I usually start with simple flowers—roses, daisies, lavender—since they’re small and fit perfectly on a 16-inch napkin) and the lines disappear when you wash the napkin. If you don’t want to draw freehand, you can print a floral outline from the internet, tape it to the back of your fabric, and trace it with a chalk pen that shows up on fabric. Avoid using permanent markers—they’ll stay forever, even after washing, and that’s not the look you want. For beginners, I recommend keeping the design simple: 3-5 flowers, a few leaves, and no more than two different types of stitch. Trying to stitch 10 complex flowers at once will only lead to frustration.
Now, the fun part: stitching the flowers. I’m not a fan of overcomplicating embroidery stitches for napkins—you want the stitches to look delicate, not like a work of art that no one will use. The two best stitches for floral napkins are the satin stitch and the backstitch. The satin stitch is perfect for flower petals—you lay down long, straight stitches next to each other to fill in a shape, and it gives a smooth, glossy look. The backstitch is great for stems and tiny details, like the center of a flower. If you’re a beginner, start with a single rose petal: take your needle and thread, bring it up through the fabric at the edge of the petal, then go back down a tiny bit next to where you came up, then come up again right next to the last stitch, and repeat until the petal is filled. It takes a little practice, but once you get the hang of it, you can do a whole flower in 5 minutes.
When it comes to thread, stick to 100% cotton embroidery floss. It’s durable, doesn’t fade, and looks the best on cotton fabrics. Avoid polyester thread—it’s too shiny and will make your flowers look cheap. Most projects use 6 strands of floss, but you can separate them if you want thinner, more delicate lines for small details. I usually use 2 strands for leaves and stems, and 4 strands for flower petals, so they’re visible but not too bulky.
Once you’ve finished stitching all your flowers and leaves, it’s time to finish the edges. This step is what turns a piece of fabric with stitches into a proper napkin. You can either hem the edges with a simple straight stitch, or use a serger if you have one. For a more decorative look, you can add a narrow lace trim along the edges, which pairs perfectly with the Cotton Lace Fabric I mentioned earlier. To hem a napkin, fold the edge over a quarter-inch, press it with an iron, fold it another quarter-inch, press it again, and stitch all the way around with a straight stitch. It’s a little tedious, but it’s worth it—no one wants a napkin with frayed edges when they’re trying to set a pretty table.
Before you use your napkins, give them a quick wash. This is important because it will set the stitches and get rid of any stabilizer residue. Wash them on a gentle cycle with mild detergent, and air dry them (or tumble dry on low heat if you’re in a hurry). Once they’re dry, press them with a warm iron—this will make the stitches lay flat and the napkin look crisp. I always press my finished napkins before I give them as gifts or set them on a table; it’s a small step, but it makes a huge difference.
Over the years, I’ve learned that the best floral embroidery napkins aren’t the ones with the most stitches or the fanciest fabrics—they’re the ones that feel personal. Last year, a customer of mine who buys fabric from Cotton Schiffli Fabric told me she made a set of 12 napkins for her family’s Thanksgiving table, each with a small flower that represented one of her relatives—sunflowers for her dad who grows them, daisies for her mom who loves cottage gardens, and so on. That’s the magic of this project: it’s not just a craft, it’s a way to make something that connects people.
If you’re just starting out, don’t get discouraged if your first few napkins aren’t perfect. I made a set once where I stitched a lopsided sunflower, and instead of throwing it away, I used it as a “casual” napkin for everyday meals. Now it’s my favorite one. The key is to take your time, pick a fabric that works for your skill level, and have fun with the designs.
If you’re looking for more embroidery fabrics to experiment with, my team and I have a full range of options, including fabrics cut to any length, embroidery guides, and customer support to help you pick the right material for your project. Whether you’re making napkins for your own table, selling them at local markets, or making a set as a wedding gift, we’re here to help.
References
- Textile Institute. (2021). Hand Embroidery Techniques for Linens.
- Cotton Incorporated. (2022). Care and Maintenance of Embroidered Cotton Textiles.
- Embroidery Design Magazine. (2023). Beginner’s Guide to Floral Embroidery for Home Decor.
- Textile and Apparel Association. (2020). Best Fabrics for Hand Embroidery Projects.